Sometimes you end up with a link that goes beyond a single line of text, and you need to make it accessible.

What is the problem?
Well, specifics can always vary, depending on the PDF. Having said that, typically a student’s assistive technology might repeat the word “link” in the middle of reading the link URL, causing confusion and irritation.
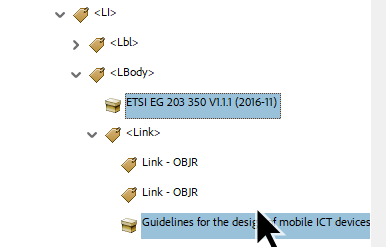
If we look at the document tagging structure, it becomes apparent why this happens – there are two OBJR tags for the link, one for each line of text.
This is just sloppy and wasteful. We only need one OBJR tag for this link.
However, getting rid of the extra OBJR is not as straight forward as you might hope.
You will have to completely remove the link, and then rebuild it the way you need it to be.
How to Fix Two-Line Links

With your tagged PDF open:
- Select the link on the content page.
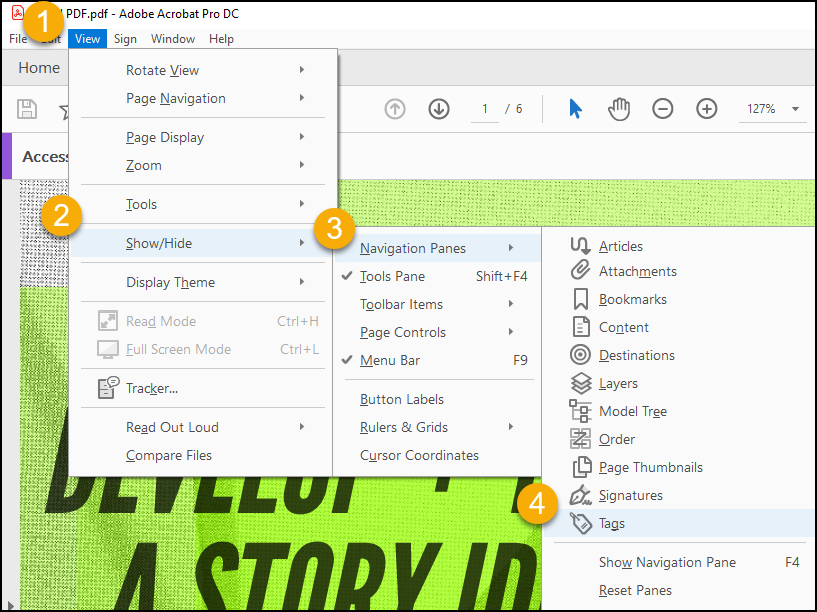
- Open the Tags panel.
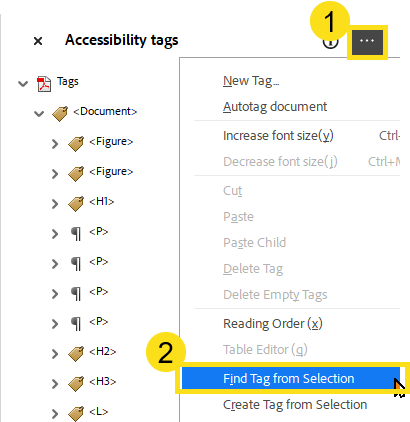
- Click the Options menu from within the Tag panel.
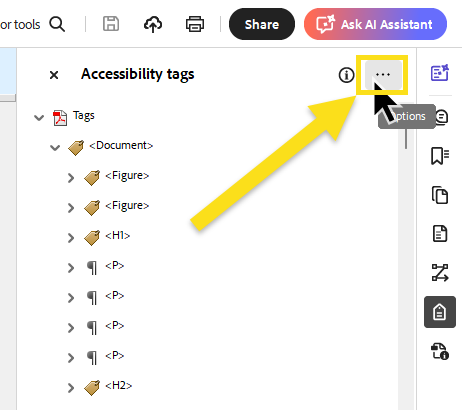
- Select the option to Find Tag from selection.
- Make sure you have identified the correct tag for your two-line link. You will notice there are two OBJR tags within the Link tag.
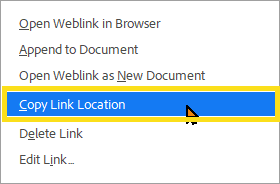
- Now address the link within the PDF content. Right click the link within the content page, and copy the link location of the url.
- Now delete the link from the page content by right-clicking on the link text and selecting “Delete Link” from the context menu. Do this for the text on both lines of the link.
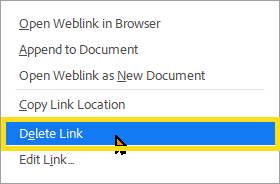
If the corresponding links did not disappear from the Tags panel, clean them by selecting and deleting them.
Your tag structure should be comprised of a tag for the link, and within that tag are paragraph/text containers that identify the clickable target of the link.
Now that we have successfully deleted the link from the page content and the tag structure, we will recreate the link so it is accessible.
NOTE: To be accessible, we must ensure that the link encompasses both lines of text within the content page and within the tag structure. We want our tag structure for the link to contain a single OBJR tag and a paragraph container for the clickable link target.
Create the Link
- Within the Tags panel, Select the Link tag for the link we are working on.
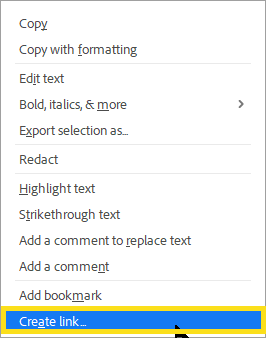
- On the PDF page, select the text which will be the anchor of the link.
- Right click the selected text, and choose “Create Link”.
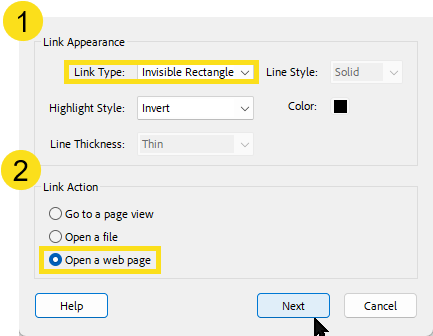
- Set the Link Appearance to be Invisible Rectangle, and the Link Action is set to Open web page.
- Next, the Edit URL dialog opens. Paste in the link you copied earlier.
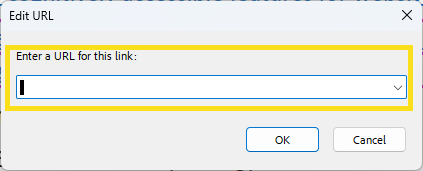
- Click OK.
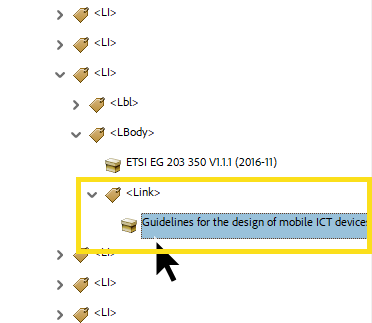
Now you should have a tag structure that includes a link with a single OBJR, and the text content that is the anchor.
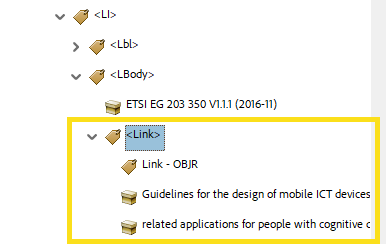
The page with selected link and the tags panel open, showing the relationship between selected content and tag:

If you are lucky, this will resolve your problem. However, sometimes even after you follow the above steps, Acrobat will not create the OBJR tag you need. Read on to learn how to fix this situation.
When Acrobat Does Not Cooperate with the Above Process
- Select the Link tag within the Tag panel.
- Open the Tag panel Options menu and select “Find”.
- In the Find panel, open the drop down menu and select the option for “Unmarked Annotations”.

- Find the unmarked annotation on the page.
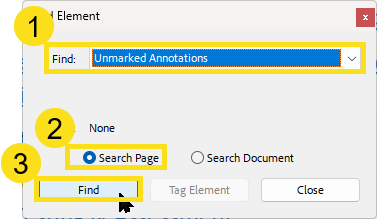
- When the link is found, open the Tag panel Options menu and select “Create Tag from Selection”.
Now you should have the OBJR tag within your Link tag.