
There are a lot of different PDF’s in the world.
Those of us who were around back when the Internet was invented can tell you horrible tales of how random and unpredictable digital information once was.
The advent of a file format that could provide a consistent layout across different computers, monitors, and printers – that was a huge deal.
Funny how quickly we can get used to something – but in the case of PDF, it is almost spooky how it gained such overwhelming dominance. There are so many ways to make a PDF that it is impossible to guess what the source might be for any unsolicited PDF file.
The PDF file format is one of the most powerful and popular digital containers around. I have found that the percentage of PDF files in any online course is usually higher than the percentage of HTML files.
Value of the Source Document
Most PDF documents tend to start as another form of information, such as an MS Word file, MS PowerPoint file, MS Excel file, Google Doc, Google Sheet, InDesign, Pages file, Photoshop, Illustrator, Chrome, Firefox, your copy machine in the corner, my flatbed scanner, your cellphone, and somebody probably has a toaster or refrigerator that can make a PDF.
I would not be surprised…
The tricky part is, if you don’t have the accessibility solutions in place within your original content, the PDF you create will also not have any of the access solutions you need.
Worst of all, it can sometimes be very challenging to apply the access strategies in Acrobat – assuming you own it.
Which reminds me, you need to own a Professional version of Acrobat to address the accessibility of your PDF documents. Get your school to buy you a copy if they haven’t already.
While you can create a PDF from pretty much anywhere, you still need to own a full version of Acrobat in order to edit and ensure accessibility is possible. I wish there was some less expensive option, but to the best of my knowledge, Acrobat still wins that category.
Access Strategies in Acrobat
Just like all the other digital formats in the world, our basic challenge is applying the access strategies for different types of digital content:
| MEDIA TYPE | ACCESS STRATEGY |
| Text | Structure (Headings, list styles, paragraph styles, etc.), clarity, legibility, contrast. |
| Images | Text descriptions and captions |
| Audio | Text transcript |
| Video | Captioning and narrative description |
| Interactive | Text labels, keyboard control, Section 508 & WCAG |
| Complex/Combination | All of the above… |
The easiest, most straight-forward and trouble-free approach is to start with a document that has all of the above access strategies in place before it was converted/saved to PDF.
Accessibility Tools
If this is your first time dealing with accessibility in Acrobat, it is most likely the case that your Accessibility Tools are not on deck.
Near the bottom of the toolbar at the right-hand edge of the program window, find and click the “More Tools” button.

Acrobat will open the Tools inventory.
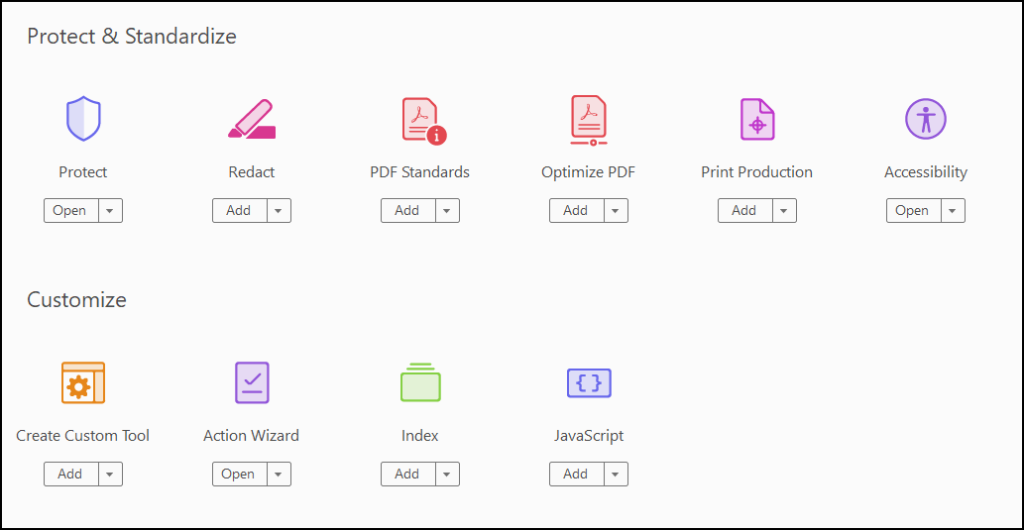
Select Accessibility from the “Protect & Standardize” category and Action Wizard from the “Customize” category near the bottom of the list. You should now have the Accessibility and Action Wizard at the bottom of your toolbar.
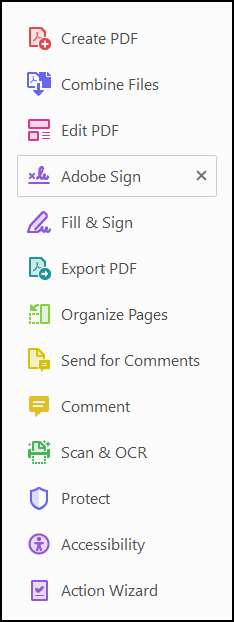
Click on the Accessibility Tool and you are ready to begin.
Tags or No Tags?
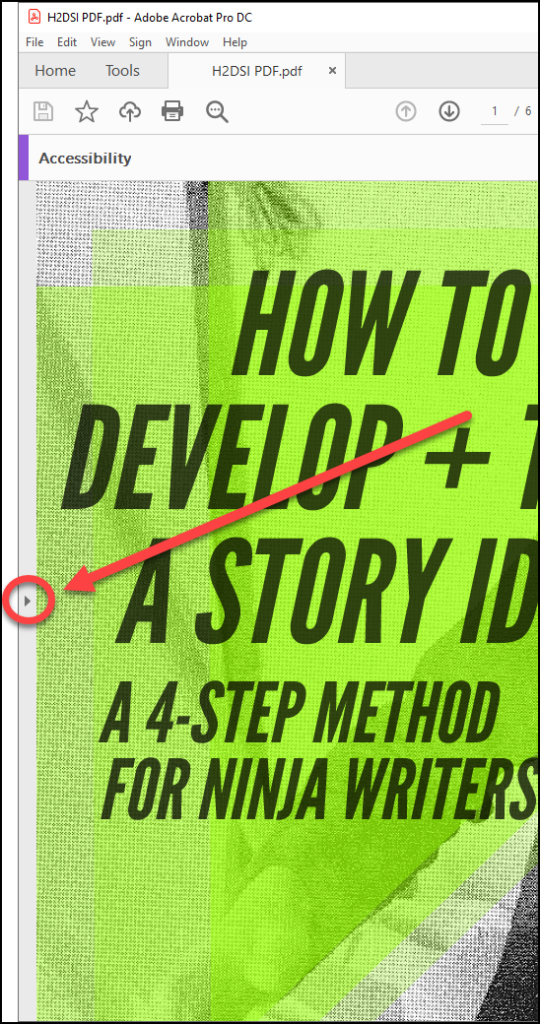
Before you can do anything with your PDF, it needs to be tagged. To view the tags tool, we need to open the Navigation Panel on the left-hand side. Find and click the expander handle to reveal the Navigation Pane.
If this is your first time checking accessibility with this document, you will probably need to load the Tags tool into the Navigation Panel. Go to the “View” menu and select “Show/Hide, Navigation Panes, Tags”.
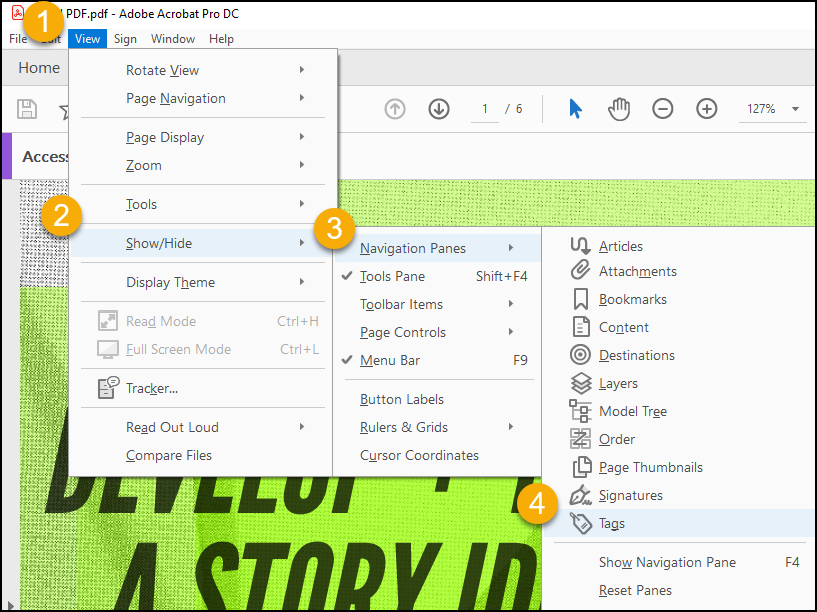
Click on the Tags tool to reveal the Tags explorer.
If it says No Tags available, proceed to the next step.
Otherwise, if you’ve got tags, skip ahead to the last step: “ACTION WIZARD: Make Accessible”.
AutoTag Document
If you’re reading this step it is because your source document did not include the advanced formatting to tell Acrobat about your content.
But this is not a big problem!
Now we will have Acrobat examine the document and do its best to figure out what kind of data the PDF is comprised of.
From the “Accessibility” tools on the right-hand side of the program window, select the first option, “Autotag Document”.
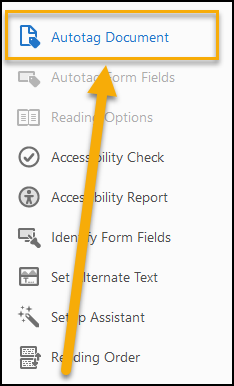
Acrobat will process your document and generate an “Add Tags Report” that typically includes any Accessibility concerns it could identify, such as images without Alt Text descriptions, questionable reading order, and various meta-information.
Issues such as discerning a logical reading order still require your attention to determine, as well as determining if alternate text descriptions are descriptive enough.
Now that your PDF is tagged, click the view control to make Acrobat display one page at a time. The Accessibility tools behave themselves better in single page view mode.
You are now ready to begin!
ACTION WIZARD: Make Accessible
Choose the Action Wizard from the toolbar. An “Actions List” will appear.
The first action in the list is “Make Accessible” – click it and follow the directions to address basic accessibility issues, the sorts of things an automated testing algorithm can deal with.
The last process the Make Accessible routine will do is prepare an Accessibility Check of your document. Examine the parameters it is testing for, and then launch the check.
Once the Accessibility Check is finished it will create an Accessibility Report with any issues affecting the accessibility of the PDF.
You can click through the links for the different issues in the report and get individual instructions for any issues that need to be addressed.
Go ahead and see what you can figure out on your own. Run the test again after you have made the suggested adjustments and make sure you didn’t miss anything.
Save your PDF with a different name if you’re worried about making mistakes.
I’ll be covering the results from an Accessibility Checker scan of a simple document in tomorrow’s post, and show you how to resolve the common issues and how to do the human verification required for others.
Thanks for reading!